Key Takeaways
- Arc welding for beginners means stick welding (SMAW) in most contexts — the most portable and accessible entry point into electric arc welding.
- The two core skills that unlock everything else are striking the arc cleanly without sticking and maintaining a consistent arc length as the rod burns down.
- Stick welding uses a drag technique — gun angled back, away from the direction of travel — unlike MIG welding which typically uses a push angle.
- Welders don’t coat welding rods with WD-40 — the idea contradicts everything proper electrode storage is designed to achieve.
- The milk myth traces back to metal fume fever from galvanized steel fumes — there’s no medical evidence it works, and proper ventilation is the actual solution.
What Is Arc Welding?
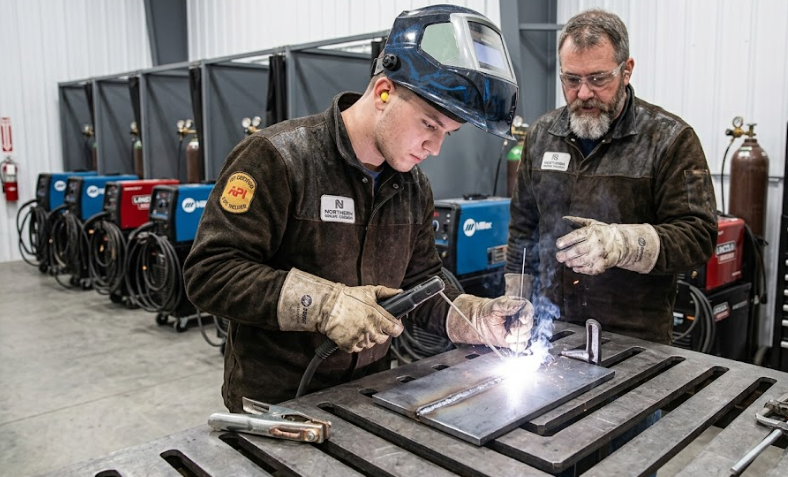
Arc welding is the umbrella term for any welding process that uses an electric arc between an electrode and the base metal to generate heat — MIG, TIG, stick, and flux-core welding are all types of arc welding. When beginners search “how to arc weld,” they’re almost always asking about stick welding specifically (SMAW — Shielded Metal Arc Welding), since it’s the most portable, accessible, and historically taught form of arc welding and the one most commonly called “arc welding” in casual shop conversation.
Is It Hard to Learn Arc Welding?
Stick welding is accessible but genuinely has a steeper initial learning curve than MIG — primarily because it requires skills MIG’s automatic wire feed removes from the equation. Three things beginners struggle with most:
Striking and maintaining the arc — starting the arc requires either a scratch or tap motion without letting the rod stick to the base metal, and then maintaining a consistent arc length as the electrode shortens requires steady, compensating movement.
Managing arc length — too long an arc produces excessive spatter and a weak weld; too short and the rod sticks. Most beginners oscillate between these two failure modes for the first several hours of practice.
Travel speed and electrode angle — moving too fast produces a narrow, cold bead; too slow produces excessive buildup. Getting all three variables consistent simultaneously is what takes practice.
That said, most beginners are producing recognizable weld beads within their first practice session, even if they’re not consistent yet. The gap between “getting something to stick” and “laying down a reliable, consistent bead” is what takes deliberate practice to close.
How to Do Arc Welding in an Easy Way
The simplest framework for a beginner’s first stick welding session:
Choose the right rod — 6013 is the most forgiving starting electrode, with a smooth, quiet arc and easy slag removal. 6011 handles dirty or rusty metal better. Both are more forgiving of inconsistent technique than 7018.
Set amperage in the middle of your rod’s range — for a 3/32″ 6013 rod, that’s roughly 60–80 amps. Starting in the middle gives you room to adjust up or down based on what the arc and bead tell you.
Practice striking the arc before worrying about the bead — scratch or tap the rod against the base metal, and the instant the arc strikes, maintain a gap roughly equal to the rod’s diameter. Spend the first 10–15 minutes just striking and holding an arc without moving, until it feels natural.
Move once the arc is stable — travel at a pace that keeps the molten pool about twice the width of your rod, with a consistent drag angle of 5–15 degrees away from the direction of travel.
Chip and brush the slag before inspecting the bead — slag from stick welding always needs to be chipped and brushed before you can see what the actual weld looks like underneath.
Do You Push or Pull When Arc Welding?
For stick welding, you drag — the electrode is angled back, away from the direction of travel, typically 5–15 degrees. This drag technique (sometimes called backhand welding) keeps the arc on the leading edge of the molten pool and produces deeper penetration than a push angle would.
This is one of the more common points of confusion for beginners who’ve read about MIG welding first, where pushing (angling the gun forward into the direction of travel) is the standard technique for solid wire. The two processes use opposite default angles for different reasons:
Stick welding (drag) — angling back keeps the electrode closer to the molten pool and the slag pushed behind the weld, not ahead of it.
MIG welding with solid wire (push) — angling forward into the direction of travel keeps the gas shielding coverage ahead of the puddle for cleaner results.
The practical rule for arc welding: if the process produces slag (stick and flux-core), drag. If it uses external shielding gas with solid wire (MIG), push.
How to Arc Weld for Beginners: Step-by-Step
- Set up your safety equipment first. Properly shaded auto-darkening helmet (shade 10–11 for most stick welding amperage), leather gloves, flame-resistant clothing, and adequate ventilation — non-negotiable before anything else.
- Prepare your base metal. Clean steel welds better than dirty steel. Remove rust, mill scale, and paint from the joint area with a wire brush or grinder.
- Select your electrode and set amperage. Start with 3/32″ 6013 at around 70 amps for practice on mild steel plate.
- Practice striking the arc on scrap. Scratch or tap technique — lift immediately when the arc strikes to establish a gap about equal to the rod diameter. Repeat until you can do it without sticking.
- Run your first bead. Drag angle, consistent travel speed, and keep your eyes on the leading edge of the puddle rather than the arc itself — where you’re going, not where you’ve been.
Reading the Arc Sound and Bead
The arc tells you as much as the bead does — learning to hear the difference makes dialing in settings significantly faster:
Steady sizzling or bacon-frying sound — well-tuned arc, consistent heat, good rod angle.
Loud popping or cracking — arc length too long, or amperage too high for the rod and material.
Stuttering or hissing — arc length too short, rod about to stick, or amperage too low.
The bead — a properly tuned stick weld shows consistent ripples, a width roughly twice the rod diameter, and slag that chips off in sheets rather than stubbornly fusing to the surface.
Why Do Welders Coat Welding Rods With WD-40?
They don’t — this is a persistent myth with no basis in actual welding practice, and the idea directly contradicts how welding electrodes work. Stick welding rods, particularly low-hydrogen rods like 7018, are specifically designed to be kept dry because their flux coatings absorb moisture, and moisture in the coating causes porosity and hydrogen cracking in the finished weld. WD-40 is an oil-based product — applying any oil or solvent to a welding rod would contaminate the flux coating and introduce exactly the kind of contaminants that welders work to prevent.
Where this myth possibly comes from: welders do sometimes use light oil to protect tools and equipment from rust between uses. Someone may have misunderstood this general maintenance practice as applying to the rods themselves. In reality, proper electrode storage means a sealed container or a rod oven that keeps moisture-sensitive rods dry — not coating them in anything.
Why Do Welders Drink Milk After Welding?
This traces to a long-standing shop myth associated with welding galvanized steel, which releases zinc oxide fumes that can cause metal fume fever — a flu-like condition involving chills, nausea, and fatigue that typically appears several hours after exposure. The belief that milk counteracts this has circulated in shops for generations, but there’s no solid medical evidence that drinking milk prevents or treats metal fume fever.
The actual solutions are: avoiding welding galvanized metal without removing the coating first where possible, ensuring adequate ventilation when galvanized work is unavoidable, and using a properly rated respirator for fume-generating work. These approaches address the actual exposure mechanism that causes metal fume fever rather than treating a symptom after the fact.
Common Mistakes Beginners Make When Arc Welding
- Trying to watch the arc instead of the puddle — the arc itself is too bright to give useful information; the edge of the molten pool tells you where you’re going and how fast.
- Moving too slowly out of caution — excessive buildup from slow travel speed looks as wrong as a cold bead from moving too fast, and causes as many problems.
- Not practicing arc striking separately — jumping straight into running beads before striking feels comfortable means sticking the rod constantly interrupts the first practice sessions.
- Ignoring the slag before inspecting the weld — chipping and brushing reveals what the actual weld looks like; evaluating through slag gives a false read.
- Assuming WD-40 or other coatings help the rod — contaminating electrodes with oil-based products undermines the exact protection the flux coating exists to provide.
Wrapping Up
Arc welding for beginners comes down to two learnable skills — striking and holding the arc, and dragging it along the joint at a consistent speed and angle — and a handful of myths worth setting aside before they become habits. Start with a forgiving rod like 6013, practice the arc strike until it’s automatic, and let the sound of the arc tell you what to adjust.
Frequently Asked Questions
How do you do arc welding in an easy way?
Start with a 3/32″ 6013 rod at around 70 amps, practice striking the arc on scrap until it feels natural without sticking, then run short beads with a consistent drag angle and travel speed. Reading the arc’s sound and the bead’s appearance tells you what to adjust before the next pass.
Do you push or pull when arc welding?
For stick welding, you drag — the electrode angles back, away from the direction of travel, at roughly 5–15 degrees. This is the opposite of solid-wire MIG’s push technique, and the reason is keeping slag behind the weld rather than ahead of it.
Is it hard to learn arc welding?
Harder initially than MIG, but not difficult to start producing results in a first session. The main challenges are striking the arc without sticking and maintaining consistent arc length as the rod shortens — both are learnable with deliberate practice.
Why do welders coat welding rods with WD-40?
They don’t — this is a persistent myth that directly contradicts proper electrode storage. Oil contamination on a welding rod’s flux coating introduces exactly the contaminants welders work to prevent, causing porosity and weakened welds.
Why do welders drink milk after welding?
This comes from a shop myth tied to metal fume fever from welding galvanized steel — there’s no medical evidence that milk prevents or treats this condition. Proper ventilation and a respirator when welding coated metals are the actual protective measures.